Get rid of potholes in your area by reporting them (Click on the animation below)

Wednesday, 11 May 2011

Turning & Controlling Molten Metal

In the seemingly modern way with family, friends, exercise, and this blog, it's been too long.

Before Easter we had some more time on the lathes, which enabled me to start and finish my bearing plug and housing, and start my tapered shaft.

The bearing plug was a two part job, the plug first, then the housing.  They had to fit into each other perfectly, so precision is necessary.  A lot of it relied on knowing exactly how big you'd made your plug, so when you came to make the housing you would know what size to make it.


 I was happy with the result, as it's a great fit.


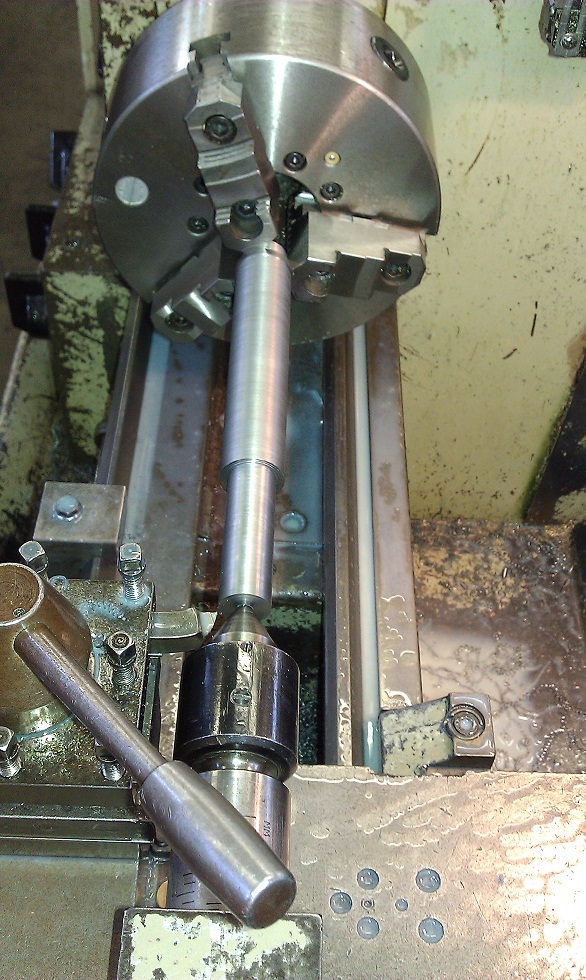
Next up, the tapered shaft - haven't finished this one, so more will appear later on in the future with this.  It's a two part job.  First you turn the tapered shaft, then the ring to fit it.  Once you have made the ring, you then mallet it onto the tapered shaft, and then turn down the outside diameter of the ring until it matches requirements.  I have done the ring too (not shown here), but have yet to put them together and finally turn down the outside diameter.  Shouldn't take long to finish that one.


During Easter, I had to work on finishing a project I didn't finish four years ago - mirror polishing a set of alloy wheels.  I spent almost a day getting rid of corrosion and pitting on the wheel, and prepping it ready for polishing.  Since then, I spent a few hours polishing and it's nearly done now.  Once they are finished I won't be able to wait to get them off my hands!


3 complete next to one awaiting completion.


Emerying Stages


Ready to polish


Centre polished - this was the most painful part, as has to be done with felts on the end of a drill spindle.


Progressing...

Should hopefully finish the lot this weekend.


After Easter, we began welding, which has been enjoyable.  Here's a few of my practice pieces below. Our final job is to complete a pipework project/exercise which I've shown a photo of below.  It involves quite a bit of cutting, filing and welding (of differing types).

One of our instructors demonstrating a lap weld (gas welding)

Gas Welding Lap Joint on 1.6mm steel plate

Gas welding butt join on 1.6mm steel plate

Tig weld - Fillet joint on 3mm steel plate

MMA (Manual Metal Arc) Welding - Butt join on 6mm steel plate.  Used weave technique

MMA Welding - Fillet weld on 6mm steel plate.  Used multi-run technique:  Three runs layered in sequence.  On left hand side, a slag inclusion from one of the first two welds prevented me from controlling the molten metal pool, so it deviated off course.

MIG (Metal inert gas) - Fillet weld on 6mm steel plate.


 Example workpiece - we have to complete one of these.  The end plate (on the left) is our butt weld that we did using a weave technique with MMA welding

We had to learn to use the gas cutting torch before we could begin our pipework.

Using gas cutting torch to cut v notches out of pipe.  We then used the vice to compress the ends, forming a converging nozzle. 


V notches cut out, ready to go in the vice. 

I've just welded the four seams on the reducer nozzle, and then welded my MMA butt plate (from previously) to it.  I have tomorrow to attempt to finish the rest of the pipework - hopefully I will manage it before the end of the day...

Wednesday, 6 April 2011

Sunny Days and UAOs

It's said that a change is as good as a break.  After the five exams last week (Steam Propulsion, Motor Propulsion, Ship Construction, Marine Electrics, Marine Auxiliary Principles) nothing could be more welcome than two weeks of workshop.  

Since Monday, our group have been learning more turning on the lathes, while the other groups do welding, hand fitting or powerplant.  It's been a really enjoyable change, and I've just started the fourth UAO (if you remember, I mentioned our 'UAOs' last year - Useless Arbitrary Objects) since the beginning of the week, so it's going well.  Our first one was a simple stepped shaft, to demonstrate we could turn lengths and diameters accurately, plus facing off.  This had to be done in two stages - the first turning it down to one size, and the next making the diameters smaller again, but keeping the turned lengths the same.  These two stages were just to demonstrate we had the skills necessary.  

CLICK ON ANY PHOTOS WITHIN THIS FOR LARGER SIZE

Beginning stages

My work plan, clipped to lathe for easy reference while I work

Final Result


For the second workpiece we used the first workpiece and turned it down to make it smaller.  We then added a female thread, a male thread, a taper, chamfers, and knurled it.  For this job we also had to practice mounting it in the four jaw chuck.  Getting the job exactly central in the chuck is crucial, and involves a process which is, I would guess, most similar to leveling a snooker table.  It seems difficult when you don't know how, but with some good explanation, and some precise turns on the chuck key, it all falls into place easily.  I completed this job on Tuesday.


Workpiece in four jaw chuck (DTI used to check workpiece in position correctly)

Drawing plus workpiece

Finished workpiece


After completing this on Tuesday, I began the third workpiece - this involved some new techniques not used before.  We had to use a grooving tool - used to create (you guessed it) grooves in the job.  This involved some logical and careful thinking to get the grooves in the correct place, as the general tolerance for the job was plus or minus 0.2mm - this is actually pretty generous though I think, considering the accuracy.

Turning in motion

Same again, different view

Initial lengths turned

Knurling completed

Knurling close up

Finished workpiece - it's a beauty


I finished this job quite late on today, but did get started on the fourth - the bearing plug and housing.  This is the most difficult job so far I think, probably due to the obvious fact that it is the fourth (!), but mainly the accuracy needed.  We will be creating two different parts: a bearing plug, and a bearing housing.  They need to fit together perfectly.  Hence, it's prudent to make them carefully and accurately.  It's already been a bit hairy so far, as I had to turn metal off the workpiece up to about 1mm away from the chuck (as I had so little material to deal with).  Any further and the chuck would have hit the tool - result: devastation!  However, it is still going well so far.  I'll let you know how that one goes soon.

Today must have been the best day of the year so far, weather wise - a significant change from yesterday's constant wind and rain.  It was amazingly hot, with little wind, and for breaks and lunch we were all able to sit outside on the beach of the Hamble, watching the yachts head in and out.  It made everybody feel fantastic, and due to our restoration of free time in the evening now the exams are over, Chris B, Chris T and I were able to head to The Rising Sun pub on the waterfront for a quick drink after finishing in the workshop.  We had a beer in the sun (it was still really hot even at 5pm) and relaxed for a bit.  It was fantastic, especially as it was one of those spur of the moment decisions to go there.